
How to Set Up Google Ads Conversion Tracking the Right Way (2026 Step-by-Step Guide)
Conversion tracking is the foundation of every Google Ads account that delivers results. Without it, you are bidding blind — Smart Bidding has no signal to optimise toward, your ROAS calculations are guesswork, and you have no idea which campaigns, ad groups, or keywords are actually generating leads and revenue. This guide walks through the complete 2026 conversion tracking stack in plain language: what to set up, which method to choose, and how to verify everything is working before you spend another pound or dollar.
Quick Answer: Set up Google Ads conversion tracking by creating a conversion action in Google Ads (Goals → Conversions → + New), then deploying the tracking tag via Google Tag Manager — or link your GA4 property and import Key Events directly. Enable Enhanced Conversions for 10–15% better attribution accuracy. Test using GTM Preview mode or Tag Assistant before your campaign goes live.
Why Getting Conversion Tracking Right Matters More in 2026
The gap between accounts with strong conversion tracking and accounts with weak tracking has widened significantly. According to Hyper FX’s analysis of 1,000+ customer accounts managing $10M+/month in ad spend, conversion tracking issues are the single most common cause of underperformance in new accounts — and most accounts don’t realise anything is wrong until a proper audit is run.
The reasons the stakes are higher in 2026 specifically:
- Smart Bidding strategies (tROAS, tCPA, Maximise Conversions) rely entirely on conversion data as their input. Poor tracking data equals poor bidding decisions.
- iOS App Tracking Transparency has caused a 70–80% opt-out rate since 2021 (per Adjust and Branch industry data), reducing browser-based conversion signals significantly.
- Google renamed ‘Conversions’ to ‘Key Events’ inside GA4 in March 2024 — confusing setups where teams try to deduplicate the same event from two sources.
- Consent Mode V2 became mandatory for EEA/UK advertisers — non-compliance breaks tracking silently rather than throwing errors.
Fix the tracking first. Everything else in your Google Ads account depends on the quality of the data coming in.
Step 1: Create Your Conversion Action in Google Ads
Before any tag goes on your site, define what you are tracking and why.
- In your Google Ads account, click the Goals icon (flag icon) in the left navigation.
- Under ‘Conversions’, select ‘Summary’, then click the blue ‘+’ (New conversion action) button.
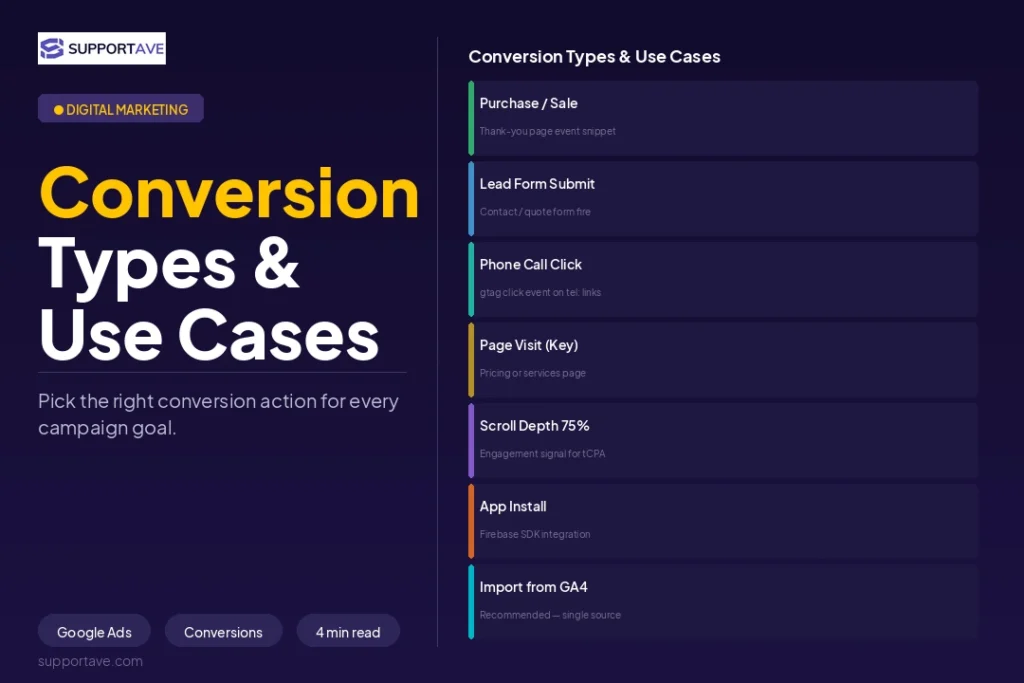
- Choose your conversion source. For website actions (form submissions, purchases, phone clicks), select ‘Website’.
- Enter your website URL and let Google scan for pre-configured actions, or select ‘Add a conversion action manually’.
- Configure the conversion: set the Category (Purchase / Lead / Sign-up), give it a descriptive name, set the Value (use a fixed value or choose ‘Don’t use a value’ for leads), and set Count to ‘One’ for leads or ‘Every’ for purchases.
- Set your Conversion window (how long after an ad click a conversion is counted — default 30 days for click, 1 day for view-through). For longer sales cycles, extend the click window to 60–90 days.
- Attribution model: Data-driven is the default and recommended model in 2026 as it uses your account’s actual path-to-conversion data rather than a fixed rule.
- Click ‘Create and Continue’. Google will now show you the tag implementation options.
Important: Select ‘Use Google Tag Manager’ on the next screen. This is the right method for almost all businesses. Copy your Conversion ID (format: AW-XXXXXXXXXX) and Conversion Label — you will need both in Step 2.
Step 2: Install Google Tag Manager on Your Website
If GTM is already installed on your site, skip to Step 3. If not:
- Create a free GTM account at tagmanager.google.com. Set up a container with your website URL.
- GTM gives you two code snippets. Place the first snippet (the <script> tag) in the <head> of every page. Place the second snippet (the <noscript> tag) immediately after the opening <body> tag on every page.
- For WordPress sites: use the Insert Headers and Footers plugin, or add the GTM snippets directly to your theme’s header.php and body-open hook. Rank Math does not handle GTM installation — use a dedicated plugin or your theme.
- Verify installation: in GTM, click ‘Preview’. A Tag Assistant window will open connected to your site. Navigate to your homepage — if the GTM container appears as ‘Connected’, the install is correct.
GTM is the single container that holds all your marketing tags (Google Ads, GA4, Meta Pixel, LinkedIn, Hotjar). Every tag fires from the same container, every trigger is managed in one place, and every change is versioned and reversible.
Step 3: Configure the Google Ads Conversion Tag in GTM
- In your GTM workspace, go to Tags → New → Tag Configuration.
- Select ‘Google Ads Conversion Tracking’ from the tag type library.
- Enter the Conversion ID (AW-XXXXXXXXXX) and Conversion Label you copied from Google Ads in Step 1.
- Set the Conversion Value: use a GTM variable (e.g. {{DLV – purchase_revenue}}) for dynamic ecommerce values, or enter a fixed number for lead generation forms.
- Set the Transaction ID: use a unique order or submission ID variable to prevent duplicate conversions from being counted if a user refreshes the confirmation page.
- Set the Currency Code: enter your currency (GBP, USD, EUR, etc.).
- Trigger: this controls when the tag fires. For a thank-you page, create a Page View trigger with the condition ‘Page URL contains /thank-you’. For a form submission, use a Form Submission trigger. For a purchase, use a Custom Event trigger matching your dataLayer push event (e.g. ‘purchase’).
- Name the tag clearly (e.g. ‘Google Ads — Lead Conversion — Contact Form’) and click Save. Then click Submit to publish the container version.
Critical check: A Conversion Linker tag is required in your GTM container for attribution to work correctly across devices and browsers. Go to Tags → New → Conversion Linker. Set it to fire on All Pages. Without this, the GCLID (Google Click Identifier) that connects ad clicks to conversions will not be stored correctly.
Alternative Method: Import GA4 Key Events into Google Ads
Instead of a direct Google Ads tag, you can link your GA4 property to Google Ads and import Key Events as conversions. This is a valid approach but comes with trade-offs.
| Factor | Google Ads Tag (GTM) | GA4 Import |
| Attribution accuracy | High — fires on the exact conversion event | Lower — relies on GA4’s attribution model |
| Setup complexity | Moderate — requires GTM configuration | Low — done in the Google Ads interface |
| Deduplication risk | Low — one source of truth | High — must deduplicate with transaction_id |
| Real-time data | Yes | 6–24 hour delay in GA4 imports |
| Best for | Lead gen, ecommerce, primary conversions | Secondary signals, engagement tracking |
Recommendation: use the native Google Ads tag (via GTM) for your primary conversion actions. Use GA4 imports for secondary micro-conversions (scroll depth, video views, time on page) where precision matters less. Never import the same event from both sources without deduplication — this inflates your conversion counts and corrupts your bidding data.
To link GA4 to Google Ads: in GA4, go to Admin → Google Ads Links → Add Link. Follow the workflow. Then in Google Ads, go to Goals → Conversions → New Conversion Action → Import → Google Analytics 4 → select your Key Events.
Step 4: Enable Enhanced Conversions
Enhanced Conversions improve measurement accuracy by using hashed first-party data (email addresses, phone numbers) to match conversions to Google accounts — recovering attribution lost to cookie restrictions and privacy changes.
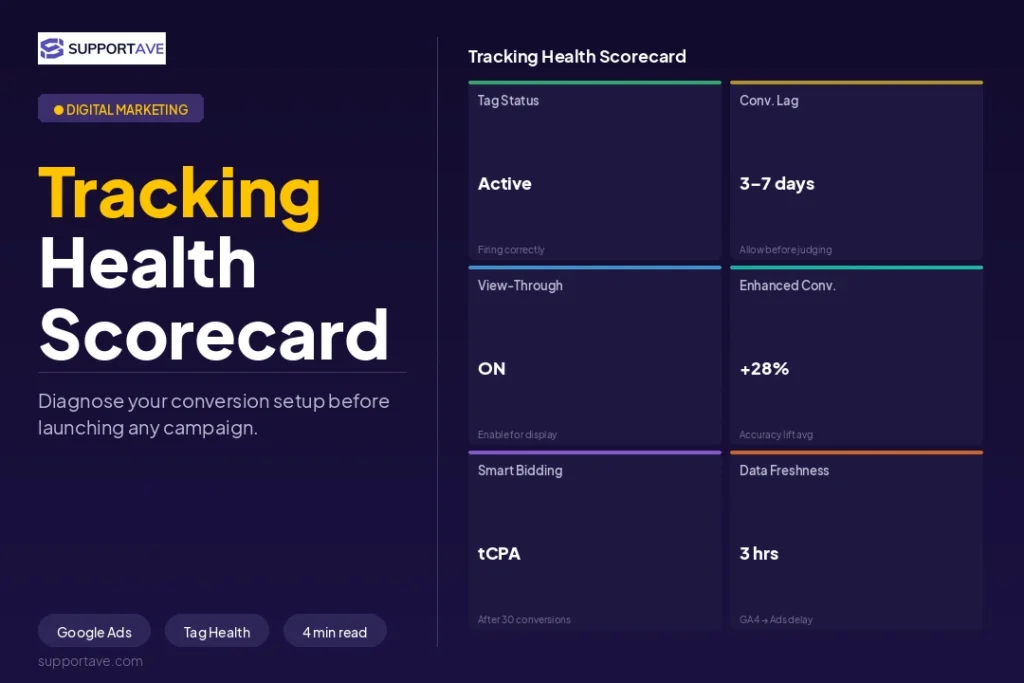
According to Google’s published case studies, Enhanced Conversions improve conversion measurement by 5–17% on average. For e-commerce advertisers, Google data shows up to a 28% improvement in measured conversions when Enhanced Conversions are properly configured.
- In Google Ads, go to Goals → Conversions → Enhanced Conversions for web.
- Toggle on ‘Turn on enhanced conversions for web’.
- In GTM, open your Google Ads Conversion tag and find the ‘User-provided data’ section.
- Choose ‘Manual configuration’ (not ‘Automatic’ — automatic detection creates GDPR compliance risks). Configure variables that pull the hashed user data from your dataLayer (email, phone, name).
- Ensure your website pushes this data to the dataLayer on conversion pages: form confirmations, order confirmation pages, account creation success pages.
- Publish the container and verify in GTM Preview that the enhanced conversion data is being sent alongside the main conversion tag.
Step 5: Test That Everything Is Working
Do not assume your setup is correct — verify it. Broken tracking looks plausible in the dashboard while being completely inaccurate.
- GTM Preview mode: before publishing any container version, use GTM’s built-in Preview mode to walk through a test conversion. Confirm the Conversion Linker, the Google Ads Conversion tag, and the GA4 Config tag all fire in the correct sequence on the correct page.
- Tag Assistant: install the Google Tag Assistant Chrome extension. Complete a real test conversion on your site and confirm the AW-XXXXXXXXXX conversion tag fires and reports ‘Tag Fired Successfully’.
- Google Ads Recent Conversions: after a test conversion, check your Google Ads account under Goals → Conversions → Summary. Look for a ‘Recent conversions’ column. It can take up to 24 hours for test conversions to appear.
- GA4 DebugView: if using GA4 events, open GA4 Admin → DebugView and complete a test conversion. You should see the conversion event appear in real time with the correct parameters (value, currency, transaction_id).
- Diagnostic tab: Google Ads has a built-in diagnostics section under Goals → Conversions → Diagnostics that flags common setup errors including missing Conversion Linker tags, duplicate conversions, and Consent Mode misconfiguration.
Common Mistakes That Break Conversion Tracking
- Counting every micro-conversion as a primary conversion (signups, page views, scrolls). This floods Smart Bidding with low-value signals and degrades performance.
- Forgetting to store the GCLID at the moment of click for offline conversion imports. If a lead fills a form but converts offline (a phone call that closes into a sale), you need the GCLID to connect the ad click to the final outcome.
- Importing GA4 conversions and running a parallel Google Ads tag for the same event without deduplication via transaction_id. This double-counts conversions and inflates your reported ROAS.
- Making large budget changes (more than 20%) immediately after fixing or implementing conversion tracking. The algorithm needs time to re-learn — treat the first 2 weeks post-fix as a new learning phase.
- Not implementing Consent Mode V2 for European traffic. Without it, Google cannot model conversions for users who decline cookies — your data underreports conversion volume from EEA/UK audiences.
Frequently Asked Questions
What is the difference between a Google Tag and a GA4 import for conversion tracking?
A native Google Ads tag (deployed via GTM) fires directly on the conversion event and sends data to Google Ads with the precision of the exact moment the action occurs. A GA4 import takes conversions already tracked in GA4 and imports them into Google Ads — simpler to set up but introduces a 6–24 hour data delay and uses GA4’s attribution model rather than Google Ads’ own. Use the native Google Ads tag for primary conversions and GA4 imports for secondary measurement signals.
How long does it take for conversions to appear in Google Ads?
After a real conversion occurs, it typically appears in your Google Ads account within 24 hours. For test conversions in Tag Assistant, you may see them more quickly in the ‘Recent Conversions’ column under Goals → Conversions → Summary. Google’s conversion counting can sometimes take up to 3 days for all conversion paths to be fully processed, especially for view-through or cross-device conversions.
What is Enhanced Conversions and do I need it?
Enhanced Conversions is Google’s mechanism for recovering attribution lost to ad blockers, cookie restrictions, and iOS privacy changes. It works by hashing first-party user data (email, phone) collected on your conversion pages and matching it to signed-in Google accounts. According to Google’s own case study data, it improves measured conversion volume by 5–17% on average. If you are spending more than $1,000/month on Google Ads and have any EEA/UK traffic, Enhanced Conversions is essential.
Can I set up conversion tracking without Google Tag Manager?
Yes — you can install the Global Site Tag (gtag.js) directly into your website’s HTML header, then add event snippets to specific conversion pages. However, GTM is strongly recommended for most businesses because it centralises all tracking tags, allows non-developers to make changes, supports version control and rollback, and makes testing significantly easier. The direct installation approach works but creates ongoing maintenance headaches when you need to update or add conversion actions.
What is the Conversion Linker tag and why do I need it?
The Conversion Linker tag stores first-party cookies on your site that link Google Ads click data (the GCLID parameter in your URL) to conversion events. Without it, Safari’s Intelligent Tracking Prevention (ITP) and similar browser restrictions will delete the GCLID before the conversion occurs, breaking attribution. The Conversion Linker tag must be present in your GTM container and set to fire on All Pages — it is a prerequisite for accurate cross-device and cross-session attribution.
Supportave manages Google Ads campaigns with full conversion tracking setup included. See our digital marketing services at supportave.com/digital-marketing — or contact us at supportave.com/contact.